Showing posts with label gifts. Show all posts

Saturday, December 16, 2017

Make & Bake Gifts 2017

This year has flown by so quickly, it's hard to believe that Make & Bake Gifts has come and gone.  Every December, we combine the two popular teen clubs, First Friday Art Club and Teen Cooking Club, into one special event called Make & Bake Gifts.
Googly Eyes and Glitter Glue
With special guests in tow, we had several stations to make a gift or bake a gift for the holiday season.  The very colorful Filomena Jack brought her Sock Creature project for everyone to make a few creature treasures to share.
Snip, Stitch, Sew Cool!
Taking old socks of various shapes and colors, students learned how to sew with a needle and thread.  Hand sewing is a skill that seems to be getting lost with the focus on technology in society.  I strive to keep these skills relevant to all age groups.  Filomena's patience and friendly approach to the project helped students make adorable stuffy friends for their human friends.
Creature Convention

Creatures for Christmas?
Craft Farm's mother hen, Allison Duncan, led a lip balm craft packed with essential oils and emollients.  Whether you call it chap stick or lip balm, the average cost of the natural and organic ingredient products cost nearly $5 each.  Such a simple gift can be too costly for a teen.  Providing a lesson and literacy on essential oils, each student created four separate lip balms to bomb their friends chapped lips!  
Pour the Balm

Craft a Label
There were two edible craft recipes that everyone took turns tackling.  Cinnamon Sugar Pretzels were a sweet and simple recipe that can be made in bulk.  With only 4 ingredients, this recipe is just too easy to pass.
Bulk up for the Season

I usually make batches of cookies for Christmas.  My Kitchen Aid mixer takes a beating and my propane provider loves my gas usage in the month of December.  After seeing just how much this recipe produces, I'm skipping the cookies and copying this pretzel treat!

Even Gluten Free Options

There are a few Gluten sensitive students in my charge, so we had Gluten Free products to accommodate that dietary restriction.  Even the gluten free option of this recipe was quick and easy.

Stir!  Fast!!!
The last edible craft for the Make & Bake Gifts event was Cornflake Candy WreathsThis five ingredient recipe is similar to Rice Krispy Treats, but uses cornflake cereal and green food coloring.  
Festive Fun

Students whipped up these edible wreaths in just about 15 minutes.  The wreaths they made were larger than palm size, so a bit too big for a snack.  I say they are perfect to share.  Add some red candies to represent holly berries and you're good to go.

This wraps up another fun year in Young Adult programming that I facilitate at the Southeast
Steuben County Library.  We welcome 2018 with a Photo Collage event for First Friday Art Club.

Get ready for 2018
Teen Cooking Club will learn how to Squash their Hunger in January.

We will also try to get organized with our schedules.  Starting in January, we'll try to get some focus with Middle Mondaze.  The first installation is Bite the Bullet Journal.  This event is strictly for teen, 13 years and older, who need a break from the mundane Monday.
New addition for 2018!
Thanks for visiting.  I hope this blog has inspired you to try some of the things we tested this year.  Happy Holidays!
xo,
Erica


Saturday, December 17, 2016

Fabric Holiday Cards

Fabric Holiday Cards
As a wrap up to 2016 and another chance to make gifts for loved ones, we hosted a Fabric Holiday Cards program with the fabulous Tetyana Buchholz, lovingly known as Tat.  We discussed offering this simple project to give students a chance to craft a gift, while learning valuable sewing skills.
The Lesson Begins
Tat started the class showing the basics.  Everyone needed a square of cardstock, a piece of fabric cut to the same size, and the same size sheet of Heat and Bond fusible fabric.  The process involved sandwiching the fusible fabric between the cardstock and fabric, then ironing them to bond the three as one.
Heat and Bond was a new experience for these crafters
After fusing the paper and fabric, Tat instructed everyone to cut out two different fabric patterns in half moon shapes with a template.  Once that step was complete, she showed the students how to roll and fold the fabrics to create a tree shape.  This tutorial from Life After Laundry provides clear instructions to create a different version of the tree.
Simple Folds make a Tree!
Once this step was covered, the projects started taking on individual appeal.  Each artist had their own vision and were on a mission to make their's perfect before class ended.  The tree needed a straight stitch running down the center to hold it onto the fused fabric square.
Stitch down the Center
When the tree was stitched to the fused fabric square, then individual designs stared to pop up.
"Gift Boxes" were placed under the "Tree"
Rhinestones, pom poms and more stitches

A border accent frames this card
Craft supplies were flying at all angles, but these students worked until the final seconds to finish.
Hot glue goes a long way
Each card was unique and made with love and care.  Projects like these are wonderful for creative outlet, as well as utilizing important skills like sewing.  The success of this simple project will lead to more of these classes in the new year.
Merry Christmas and Happy Holidays!
Thank you for visiting and staying awhile.  Check back in January for the next installment of Fashion Club with Tat, where we start the process of designing fashion from trash for the Recycled Runway Fashion Show.  You don't want to miss it!
Taking Trash to the Catwalk

Wishing a Happy and Healthy New Year to you and yours' in interweb land and beyond!

xoxo,
erica


Thursday, December 8, 2016

Make & Bake Gifts 2k16


Each year in December, we combine First Friday Art Club and Teen Cooking Club into one BIG CRAFTING EVENT called Make and Bake Gifts.  This is the chance to cook and create handmade gifts for the holiday season.  There are no fees for participants.  Pre-registered attendees encounter a variety of crafts to make then take away.

Fabric Covered Coaster Tiles
The first station for creating was Fabric Covered Tile Coasters.  This was an easy project that could be quick or intricate, depending upon the details put into it.  Painting Mod-Podge glue onto a ceramic tile, then adding a square of fabric cut slightly smaller than the tile and burnishing that fabric onto the tile is the main process of this craft.  Coating the fabric covered tile in more Mod-Podge to seal in the fabric finishes off the coaster.  To save table surfaces, it is recommended to glue felt onto the bottom of the ceramic tile.  As you can see, these tiles got fancy!  Details were trimmed and secured and each tile had an individual flare.
Detailed adornment
The next project was soda can basket weaving, led by Kimberly Canale.  This video tutorial is extremely helpful and recommended to anyone who wants to make one at home.  This video is part 1 of a 3 video series.


Kimberly showed the First Friday Art Club how to make these in August, but that class focused on soda can flowers.  This event allowed students the time to focus on the weaving process.  It turns out the soda cans are gnarly when cut.  Students really liked learning to weave, but kept getting caught on the soda can, which limited their enjoyment.
Gnarly snags are no fun.  WEAVING IS AMAZING!
With a little bit of patience and focus, each person created an adorable woven can.
Woven Soda Can Baskets
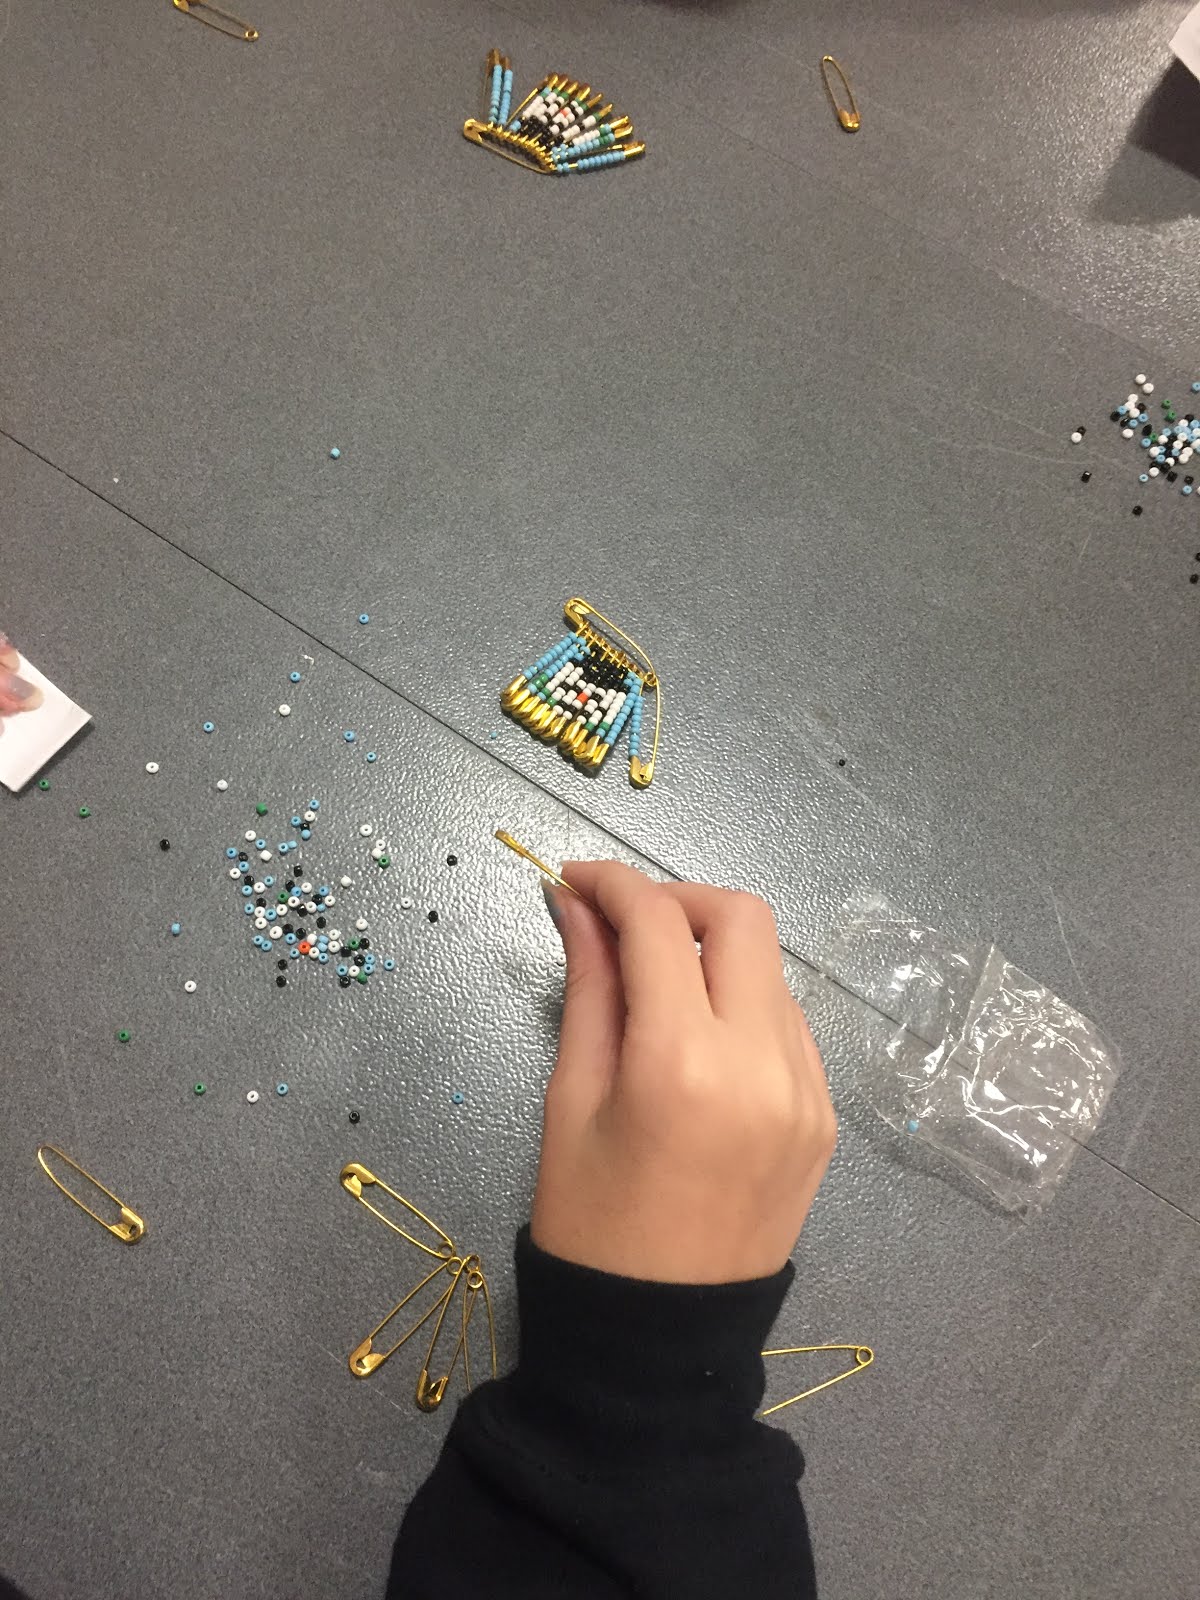
This fun Snowman pin craft kept people busy and intent for a long time.  Putting tiny beads in a specific order on safety pins is a test of eye sight and patience.
"These pins take patience!"
This project was donated by a generous community partner.  There were dozens made for family members.  I was even able to donate more to a Homeschool Arts & Crafts group.
Frosty!
The edible portion of this event hit a rough spot.  The intended recipe was Chocolate Covered Marshmallow Reindeer.  It is sad to note that I burned the chocolate for this recipe.  Ugh!!!  The smell of scorched chocolate wafted through the Union Hall within moments of placing the melting wafers in the electric skillet.  This melted chocolate thing is still a learning curve for me, especially when I'm multi-tasking. My intention was to have a pot of melted chocolate ready to dip, so there were less steps to making these cute creatures. In hindsight,  I suggest melting chocolate in the microwave, like the recipe states, or using a crock pot to maintain a low temperature for the chocolate to temper, providing a smooth appearance and dry solid on the marshmallow.
Rudolph's nose is falling off!
Since the chocolate was scorched, the cocoa butter crystallized and it would not harden.  The facial details could not stick, and the whole project was becomming a mess.  Luckily, these kids are quick to create a work-around.  Albino reindeer, snowmen, and even tarantulas were designed at this station.

Tarantula, Olaf, White Deer
Snowlady, Red-Nosed Puppymallow
The final cooking craft was a treat to most of the group.  Funfetti Shortbread Bites  are a quick and plentiful recipe, creating dozens of treats in one 13 x 9" pan.  I had older teen volunteers set up the recipe and prepare the ingredients.  When another teen finished their projects, they were welcome to help this group finish the recipe for everyone to enjoy.  These bites were packaged in a holiday box and taken away quicker than I had a chance to taste test.
Funfetti is always FUN!
This wraps up another fantastic teen Make and Bake Gifts for Southeast Steuben County Library.  Our teens had a busy year with school and library programs.  Just one more crafting session is held this week.  Join us for Fabric Holiday Cards on December 9, 2016.  Our favorite fashionista, Tetyana Buchholz will lead the group on sewing and appliqueing fabric cards for the holiday season.
Last teen craft for 2016
If you miss the program, stop back for a recap of the event.
Thanks for visiting.
I'll check ya on the flip side!

xo, erica


Friday, December 18, 2015

Make & Bake Gifts 2015

Make & Bake Gifts is our annual gift making session where First Friday Art Club and Teen Cooking Club combine for an extended creation event, just in time for the holiday season.
Union Hall tree, all dressed up
This popular event was held in the USW Local 1000 Union Hall, just behind the SSC Library (<<<>>>ooh! check out our new website!!!).  You can read about last year's event here.

Thinking up gifts that people want to receive is often hard to do, especially considering what teens want to make, are interested in creating, and are willing to save to give as a gift rather than keep for themselves, all while calculating these crafts into a short 2 hour time frame and attempting to keep all attendees busy the entire time.  This is quite the challenge.

"Tie Dye" Tile Coasters
Thanks to the community collaborative power of Pinterest, ideas are aplenty, as long as you consider your audience and budget.  The tutorial for these "Tye Dye" Tile Coasters has been provided directly by Sharpie and was relatively inexpensive.  A box of ceramic tiles cost about $12 for 50 tiles, 2 packs of Sharpie markers, scraps of felt and a bottle of rubbing alcohol are the only necessary materials for this project.  Ok, you need some hot glue to stick the felt on the backs of each tile to protect furniture surfaces, but that is somewhat optional....
Felt protects the furniture.
Recognizing that a Tie Dye look doesn't appeal to everyone, and some designs are much more beautiful left alone, I suggested to use personal judgement whether to use the alcohol to create the Tie Dye effect or not.  Many chose to keep their artistic efforts unscathed...
Tile Samples
Another project, which I thought would cost a lot less, was Crayon Candles.  Having a plethora of crayons collected over the years, I thought this was the trick to eliminating the supply....INCORRECT!  Creating these candles required a candle wax to help them burn at a better rate.  Purchasing soy candle wax, prepared wicks, glass votive holders and prepping the station with two adult helpers proved this project could have been a solo event. The process took a lot longer to create each candle than originally thought.  This is a project I will revisit in the near future, but I am well aware that it is a time thief.
Crayon Candle station
Although these candles were very time consuming, they are quite pretty with multiple layers of color.
"What's that?  CHOCOLATE!?!"
On to the edible segment of our event, we created Dark Chocolate Super Bites using a wide variety of healthful elements for mindful snacking.  Some skilled choppers prepared the station and everyone took turns creating their own heavenly bites.
Do you see a reindeer?
Rather than melting the chocolate in the microwave, we used a small crock pot to maintain a melted temperature.
Using an electric skillet, we kept the white chocolate melted for these adorable Candy Cane Heart Pops...
Too cute to eat
Thanks to my high school volunteer, Kacey, who made these pops possible with her helping hands.  Keeping a close eye on the white chocolate supply was very important.  She rationed the project perfectly.

Another fantastic Make & Bake Gifts event is now in the books.  I know those chocolate bite hit bellies before they left the building, but I hope several gift packages like these are given this holiday season.

Check back in 2016 for more incredible teen projects and events.  

Merry Christmas and Happy New Year!
 xoxo, erica